Monday, February 28, 2011

Quinoa Banana Pudding

For dinner tonight I made Mama Pea's Veggie Stir Fry over Brown Rice from her Pealightful Plans: Week One. 


This meal was yummy and very filling!

For dessert I made...

Quinoa Banana Pudding
Adapted from All Recipes


Ingredients:


  • 1 1/2 cups water


  • 3/4 cup quinoa


  • 2 cups unsweetened vanilla almond milk 


  • 2 ripe bananas


  • 1 tablespoon brown sugar  


  • 1 teaspoon cinnamon (optional)


  • 1 teaspoon vanilla extract (optional)


  • 

    Directions:

    Rinse and drain quinoa.  Bring water and quinoa to a boil in a saucepan over high heat, stirring occasionally.  Lower heat, cover, and simmer 15 minutes or until water is absorbed and quinoa is tender.   Remove from heat. 


      In a blender, combine milk, bananas, and sugar.  Blend until smooth.  Pour into saucepan with quinoa.  (I had to get a bigger pot to hold it all)


    Heat over medium heat for about 5 to 10 minutes or until mixture becomes thick and creamy. 

    Remove from heat.  Optional: add vanilla and cinnamon.  (I actually really liked the way it tasted plain)  

    Serve warm.  Enjoy! 


    Sunday, February 27, 2011

    Productive Afternoon and Go-To Meal

    I had a very productive afternoon cleaning up my closet.  I purged about 4 bags of clothes that I haven't worn in forever to donate to Goodwill. 

    My closet went from this:


    (My half is the overflowing mess on the bottom.  My 6'4" husband gets the top rack)

    I weeded out a lot of stuff


    And ended up with this much space:


    Yay!!

    Then I tackled the mess in my armoire:

    In the midst of cleaning Spot decided he would help direct where things go:


    Hopefully I can keep it neat for a while....

    Then it was time for dinner and I hadn't really thought about what we were going to have.  Sooo... I whipped up one of my go-to quick and easy meals. 

    Panko Chicken with Roasted Broccoli and Baked Potatoes

    I preheated the oven to 375 degrees, washed two potatoes, poked some holes in them, and threw them in the oven to bake.


    Then I put some broccoli in a 9x13 pan, drizzled it with olive oil, salt and pepper, and put it in the oven as well. 


    While those cooked, I cut chicken breasts into bite sized pieces and used a simple three step prep to bread them in panko breadcrumbs. 

    I dredged the chicken pieces in flour, dunked them in a bowl of beaten eggs, and shook them in a bag of panko bread crumbs. 


    Then I put them on a cookie sheet, drizzled a little melted butter on each piece, and cooked them for about 16 minutes, flipping once. 


    Mine (the first plate) were plain, and for Jay's (the second plate) I added some Celestial Seasonings barbecue seasoning to the bag of panko breadcrumbs.

    This is the seasoning that I added:

    Jay puts this stuff on EVERYTHING.  He even puts it on his mashed potatoes...which I think is utterly gross... yuck!!

    This is one of our favorite meals and we tend to have it often. :)  

    French Toast Pancakes

    Julie from Peanut Butter Fingers posted this morning about her pancake breakfast.  I responded that I also had pancakes on the brain.  I first tried this recipe a few weeks ago and my husband and I both loved it, so I decided to give it another go this AM. 

    French Toast Pancakes

    adapted from Mama Pea's Apple Cinnamon Pancakes


    Ingredients:

    1 and 1/3 cup whole wheat flour

    3 tsp. baking powder

    1 or 2 tsp. cinnamon

    1/4 tsp. salt

    1 tsp. sweetener (sugar, stevia, splenda...)

    1 1/2 cups of milk (I used light coconut milk)

    1 tsp vanilla (can add more if you want a stronger french toast flavor)

    1 cup unsweetened applesauce

    Add all the dry ingredients to a large mixing bowl and combine with a wire whisk. 


    Add the wet ingredients and mix with the wire whisk


    If you use coconut milk the batter will be pretty thick

    Cook on a non stick griddle over medium high heat.  I didn't time how long I cooked them, I just cooked them until the bottoms were golden brown, flipped them, and cooked until I felt they had cooked through. 

    Top with a little syrup (or a lot) and enjoy!


    These pancakes come out very moist and sticky like french toast (hence the name)  I like my french toast very eggy and these pancake come out like that.  I think it is from using the coconut milk.  If you want a fluffier pancake try using a different milk like almond milk or skim milk.  If you like gooey french toast then try this recipe with the coconut milk! 

    I plan to spend the rest of the afternoon cleaning out my closets and making a trip to Goodwill.  My closets are overflowing and in desperate need of some purging.  My hope is that if I make room in my closet, I will actually put my clothes away instead of building a clothes mountain at the foot of our bed forcing my husband to don climbing gear just to get to his side of the bed. 

    Saturday, February 26, 2011

    Vegetable Barley Casserole

    Have you ever been so excited to go to a new restaurant just to get there and not enjoy the food? 

    That's what happened to me last night.  I was so excited, all day, to go to a local sushi restaurant that I had been dying to try.  After waiting over half an hour to be seated, we ordered up a bunch a rolls and were so excited to dig in when the food finally came.  Usually I don't dip my rolls in soy sauce, but last night I had to DRENCH the rolls in soy sauce to try and make them taste better.  Not a wonderful food experience. 


    After last night's let down, I was looking for a recipe that would perk up my palate. 

    Surfing the net, I found a recipe on the Weight Watchers site that I had most of the ingredients for.  WAIT - WHAT??  I have all of these ingredients?  I can make this without going to the store?  Score!  That never happens to me.  I was so excited I decided to make it for lunch. 

    Vegetable Barley Casserole

    adaped from Weight Watchers


    Ingredients:

    2 tsp. olive oil

    1 small onion  - chopped (I used frozen - it was all I had)

    1 clove garlic - minced

    2 cups frozen corn - thawed and drained

    3 cups fresh spinach - washed and roughly chopped

    14 1/2 oz. canned diced tomatoes - drained

    15 oz. canned black beans - rinsed and drained

    2 cups cooked barley (follow cooking instructions on the package)

    1/4 tsp. cumin (I added a pinch more after tasting)

    1/4 tsp. dried oregano

    1/2 tsp. salt

    1/4 tsp. black pepper

    1/2 cup shredded cheddar cheese

    cooking spray
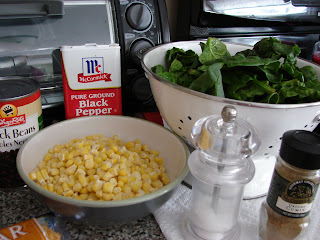


    Preheat oven to 350 degrees, spray a 2.5 to 3 quart casserole with non stick cooking spray.

    Heat a large nonstick skillet over medium heat.  Add: olive oil, garlic, onions, corn, and spinach.  Cook, stirring frequently until the onions are translucent and the spinach is tender (about 5 minutes).


    Stir in the tomatoes, barley, black beans and spice.  Cook until heated through. (love that you can see the steam in this picture!!)


    Spoon barley mixture into prepared casserole dish.  Sprinkle with cheese.  Bake until cheese melts and mixture is hot, about 20 minutes.  (I covered mine after a little bit to prevent the cheese from burning)


    Remove from oven. Let stand for a few minutes before serving.  Enjoy!   This would be great along side fish or chicken, but I had it just as is for my lunch.  Mmmm Mmmmm delicious!


    Now, I have a confession.  I am a messy cook.  When I cook, I usually spill something, drop something, and have dirty dishes everywhere.  My goal is to get better at cleaning up as I go, rather than waiting until the end.  Here is what my kitchen looked like when I was done cooking:


    (Note the stain on the stove from when the barley water boiled over)

    Now I am off to scrape the burnt water off the stove and pick up all the little pieces of cheese from the corners of the floor... Hopefully next time I can keep the food in the dish :-)

    Friday, February 25, 2011

    Fruit and Nut Granola Bars

    I was inspired to make my own granola bars after drooling over ones made by other bloggers like:

    Anne's No Bake Peanut Butter Granola Bars

    and Mama Pea's Chewy Chocolate Chip Granola Bars

    I kinda combined both of these recipes, added a bit of my own spin, and made

    Fruit and Nut Granola Bars
    makes 16 bars

    Adapted from Mama Pea's Chewy Chocolate Chip Granola Bars
    and Anne's No Bake Peanut Butter Granola Bars


    Ingredients:

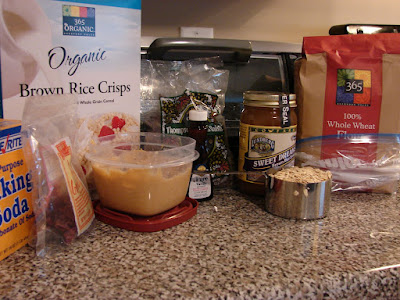
    2 cups old fashioned rolled oats

    1 cup crispy brown rice cereal

    1/2 cup whole wheat flour

    1/2 tsp. baking soda

    1/3 cup dried cranberries

    1/3 cup raisins

    1/3 cup chopped nuts (peanuts or almonds would be good) -* I omitted this and they are still delicious

    1/2 cup brown rice syrup

    1/3 cup peanut butter (I used homemade honey roasted peanut butter - SO Good)

    1 tsp. vanilla

    1/2 tsp salt


    Preheat the oven to 325 degrees and spray an 8 x 8 pan with nonstick cooking spay.

    In a large bowl combine oats, cereal, flour, baking soda, fruit, and nuts.  Set aside. 


    In a small sauce pan over medium, heat the brown rice syrup, peanut butter, vanilla, and salt.  Stir continuously until mixture just begins to bowl.  Remove from heat immediately so it does not burn. 


    Let cool for a minute and then pour into the bowl of dry ingredients. 


    Stir until all the ingredients are mixed.  Pour the mixture into the greased 8 x 8 pan. Use our hands or a spatula to press down the granola mixture to fill the pan evenly.  


    Bake at 325 for 15 -18 minutes depending on how crisp you would like your bars. 

    Remove from oven and let cool.  After the bars have cooled, cut into 16 squares.   Store in an airtight container.

    Enjoy!!


    I think the homemade peanut butter really made these bars fantastic!  The little bit of sugar in the honey roasted peanuts gave the bars a sweet and salty flavor.  When I heated up the brown rice syrup and the peanut butter it smelled like peanut brittle so I had to take a taste.  It tasted just like liquid peanut brittle!!  SO yummy!!!  I would definitely recommend using honey roasted peanut butter in this recipe.   


    Thursday, February 24, 2011

    Our Kitchen: Then and Now

    I thought I would begin by sharing my kitchen...

    When we bought our house I said I DID NOT want a fixer upper.  I wanted a house that was move in ready.  However, my husband Jay found this house online and really wanted to see it.  When I took a look at the pictures I was turned off.  I told him there was no way I would live in that house, but I decided to humor him and go take a look at the house.  The minute I walked in, I knew this was my house.  Here is how the kitchen looked when we first saw the house:

    Isn't the brown and orange paisley carpet just stunning...

    and check out that amazing orangish brown drop in stove...


    Despite the obvious need to updating I fell in love with the house.  I thought I would never buy a home that needed a lot of work, but the layout of this house had me convinced that it would be perfect for our first home. 

    Once we got the keys we started the renovations.  We removed the lovely stove and moved the cabinet over to accommodate a new stove.  Then we ripped up that gorgeous carpet, and put in a new tile floor. 


    Next came new counter tops/stove and painting the cabinets. 


    The final product: (can you find our cat Spot? :-)  )


    For three and a half years this kitchen suited us very well.  However, we were missing one thing... can you guess what it is??? 

    Yup that's right we had NO...


    Dishwasher!!

    After years of pruney fingers and sinkfuls of unwashed dirty dishes, we decided to do something about our lack of a dishwasher.  By this time, our beautiful white cabinets had started to chip and every time you took out a pot or dish you had to wipe paint chips out before using it. 

    Because of budget reasons we couldn't afford brand new cabinets (plus our counter tops were new and in great condition and the floor doesn't go under the cabinets), so we found a great company that resurfaces kitchen cabinets.  They put new maple doors on and refaced our cabinet boxes with maple as well.  I am so glad that our kitchen is finally complete and I really love not having to wash dishes for an hour after I try a new recipe. 

    The FINAL final product:


    close up of the new cabinets:


     It's not drastically different... but they are well made, don't chip, all the doors close beautifully, and most importantly I LOVE them!
    

    Sunday, February 20, 2011

    From My Kitchen to Yours

    So after spending countless hours stalking many many great blogs like Carrots N' Cake and KERF and Annie's Eats and The Pioneer Woman, and my husband asking, "when are you ever going to start a blog of your own?", I finally decided to take the leap and dive into the world of blogging myself.  My name is Jessica and I have been married to my wonderful husband for almost three years.  We have two cats(Spot and Yogi)  who we adopted shortly after we bought our house 4 years ago.  I am a first grade teacher and while I love my job, I have a passion for trying new recipes, cooking, baking, and sharing my creations with friends and family.  I TRY to eat mostly healthy foods but I love to bake decadent desserts too.  This year my new years goal was to learn how to decorate sugar cookies.  I made one successful batch so far but I still need lots of practice with the royal icing.  This blog will chronicle my kitchen adventures.   I intend to bare it all and share the good the bad and the ugly (well... lets hope there is not too much ugly...)